Sunday, December 6, 2009

Spinach-Bacon Macaroni and Cheese


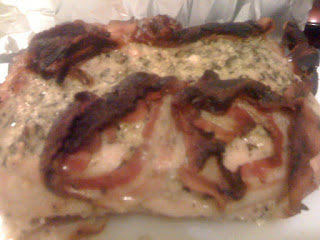
Ok, I promise I will get a better camera or make myself a lightbox so my pictures stop looking so gross:/ It is really kind of disappointing to have such a tasty meal, but then end up with a photograph like this! Maybe I'm just too critical of myself. Or maybe I can blame it on winter and it getting dark so early, making it very hard to take nice pictures.

On a happier note, we had Andy's parents, his brother and our nephew over for breakfast this morning. I thought it would be nice to have breakfast before we headed out in the cold to decorate Grandma Lavon's gravesite, and I'm also really obsessed with finally finishing our 'fancy' living room and I wanted to show it off. Here's a couple pictures of it, because I really can't resist, and this room makes me happy everytime I walk through it.


But really, the point of this post is the macaroni. I actually saw the recipe on the back of the shredded cheese as I made the Eggbake for breakfast. I'm going to be gone every night this week so I thought this would be good to try so Andy would then have some leftovers. I have not had much luck with homemade macaroni in the past, but this actually turned out really well! However, I did not have spinach so I used Arugula instead and it tasted great. I also used 1 cup sharp cheddar and 1 cup mild cheddar, and grated my own parmesan cheese instead of using the stuff in the green can.

Spinach-Bacon Macaroni and Cheese
Source: Kraft Foods

Ingredients:
3 cups medium shell macaroni, uncooked
1 pkg. (6 oz. ) fresh baby spinach leaves
4 slices OSCAR MAYER Bacon, chopped
2 Tbsp. flour
2 cups milk
2 cups KRAFT Shredded Sharp Cheddar Cheese, divided
1/4 cup KRAFT Grated Parmesan Cheese


Heat oven to 350 degrees

COOK macaroni as directed on pkg., adding spinach for the last min. Cook bacon in large saucepan. Remove bacon; save drippings in pan.


ADD flour to drippings; cook and stir until bubbly. Gradually stir in milk. Bring to boil, stirring constantly; cook and stir 3 to 5 min. or until thickened.

STIR in 1 cup Cheddar and Parmesan; cook and stir until melted. Add bacon and macaroni mixture; mix well.


SPOON into 1-1/2-qt. casserole; top with remaining Cheddar. Bake 20 min.

Enjoy!

Email subscriptions

I've slowly been exploring my way around the world of blogging, and I recently figured out how to add a 'subscription' feature on Kitchen Escapes. Anyone who's interested can add their email in the box on the right, and then you will receive an email whenever I add a new post. I'm hoping this will be a helpful feature for those interested, and not an annoyance to continuously receive emails from me:)

Thanks to all the followers!

Friday, December 4, 2009

Gruyere, Arugula and Prosciutto Stuffed Chicken Breasts


This is some fancy chicken! Probably not something that's worthy of a weeknight meal again, this is more worthy of company. I've never bought Gruyere cheese before, but it seems "company worthy" to me because of its price! I'm moving up in the world of fanciness in my blog escapades:)

The chicken is pretty salty with the cheese and proscuitto, and it is very rich. I did not make the sauce in the recipe, but next time I might try that to lighten up the chicken flavor.

Gruyere, Arugula, and Prosciutto-Stuffed Chicken Breasts with Caramelized Shallot Sauce
Source: Cooking Light

Ingredients

Chicken:
6 (4-ounce) skinless, boneless chicken breast halves
6 (1/2-ounce) slices prosciutto
6 (1/2-ounce) slices Gruyère cheese
1 1/2 cups trimmed arugula
1/2 teaspoon salt
1/2 teaspoon black pepper
3 tablespoons all-purpose flour
1 tablespoon olive oil

Sauce:
1 cup thinly sliced shallots
2 teaspoons tomato paste
2 cups dry white wine
2 1/4 cups fat-free, less-sodium chicken broth
1 1/2 teaspoons water
1 teaspoon cornstarch

Preparation:
Preheat oven to 350°.

To prepare the chicken, place each chicken breast half between 2 sheets of heavy-duty plastic wrap; pound to 1/4-inch thickness using a meat mallet or rolling pin. Discard plastic wrap. Top each chicken breast half with 1 slice prosciutto, 1 slice cheese, and 1/4 cup arugula, leaving a 1/4-inch border around edges. Fold in half, pinching edges together to seal; sprinkle with salt and pepper. (The chicken can be prepared up to a day ahead and refrigerated at this point.)

Dredge chicken in flour, shaking off excess. Heat oil in a large nonstick skillet over medium-high heat. Add chicken; cook 5 minutes on each side. Place chicken in a shallow baking pan; bake at 350° for 5 minutes or until done. Keep warm.

To prepare sauce, add shallots to skillet; sauté 4 minutes over medium-high heat or until browned. Add tomato paste; cook 1 minute, stirring constantly. Stir in wine; bring to a boil over high heat. Cook until reduced to 1 cup (about 6 minutes). Add broth; bring to a boil. Cook until reduced by half (about 8 minutes).

Combine water and cornstarch in a small bowl, stirring with a fork until smooth. Add cornstarch mixture to sauce; bring to a boil. Cook 1 minute, stirring constantly.


Asian-Style Couscous

This is the most flavorful couscous I have ever made. Normally I just maybe add some garlic or lemon and call it good. While my couscous always tastes good, this couscous is actually....moist, I guess. I don't know how else to describe it, but "moist" pretty much sums it up, and the flavor is amazing. The asian flavors are subtle enough that this dish could really go with anything.

Asian-Style Couscous
Source: Adapted from Recipezaar

Ingredients:
1 1/2 cups low-sodium chicken broth
2 Tbls. low-sodium soy sauce
1/2 tsp. sugar
1/4 tsp. ground ginger
1/4 tsp. garlic powder
1/4 tsp. cayenne pepper
1 cup couscous, uncooked

Directions:
Heat small saucepan over medium-high heat. Add chicken broth and next five ingredients. Bring to a boil. Remove from heat and add couscous to pan. Cover and let stand 5 minutes or until liquid is absorbed. Fluff with a fork.

Serve warm. Enjoy.

Thursday, December 3, 2009

Spicy Korean Pork Loin


I found this recipe in my Cooking Light Complete Cookbook, and it was SO good! We've been eating a lot of pork loins lately, (guess that's what happens when I stock up on meat sales) so I wanted to find something with a different spin on it. The brown sugar carmelizes while baking and creates a nice crust on the pork. This was really spicy too, almost too spicy for the hubby I think, and he adds cayenne pepper to everything. We served this with asian couscous and it was a perfect pairing.

Spicy Korean Pork Loin
Source: Adapted from Cooking Light Complete Cookbook

Ingredients:
2 lb pork loin
2 tbls. brown sugar
1/4 c. low-sodium soy sauce
1 tbls. crushed red pepper flakes
1 tsp. ginger, minced
2 tsp. dark sesame oil
3 garlic cloves, minced

1 c. low-sodium chicken broth

Directions:
Combine pork and all ingredients through garlic in a large ziplock bag. Marinate in refrigerator for 1 hour, turning bag occasionally.

Preheat oven to 400 degrees. Take pork out of refrigerator and let sit at room temperature while oven preheats.

Place pork in oven proof baking dish. Pour half the chicken broth into pan. Bake for 40-50 minutes, until internal thermometer reads 145-155 degrees. Let sit for 5-10 minutes to let juices settle back into meat.

Enjoy.

Tuesday, December 1, 2009

Peanutty Noodles

These noodles were a nice accompaniment to the Asian Salmon we had. I knew the noodles would be good, but I didn't want the peanut butter to overpower the taste of the fish, so I cut the amount in half and it still had enought peanut butter taste for me. I also did not have any of the fresh veggies it called for, so I just sauteed some frozen asian vegetables and it worked out fine.

Peanutty Noodles
Source: Cooking Light

Ingredients

2 carrots, peeled
1 tablespoon vegetable oil, divided
2 teaspoons grated peeled fresh ginger
3 garlic cloves, minced
1 cup fat-free, less-sodium chicken broth
1/2 cup natural-style peanut butter (such as Smucker's) (I used 1/4 cup)
1/4 cup low-sodium soy sauce
3 tablespoons rice or white wine vinegar
1 teaspoon chili garlic sauce (such as Lee Kum Kee)
1/4 teaspoon salt
Cooking spray
2 cups red bell pepper strips
1 pound snow peas, trimmed
8 cups hot cooked linguine (about 1 pound uncooked pasta)
1/2 cup chopped fresh cilantro (I omitted)

Preparation

Shave the carrots lengthwise into thin strips using a vegetable peeler, and set aside.

Heat 1 teaspoon oil in a small saucepan over medium heat. Add the ginger and minced garlic; sauté 30 seconds. Add chicken broth and the next 5 ingredients (broth through salt); stir until well-blended. Reduce heat, and simmer 7 minutes, stirring occasionally. Remove from heat, and keep warm.

Heat 2 teaspoons oil in a large nonstick skillet coated with cooking spray over medium-high heat. Add bell peppers and snow peas; sauté 5 minutes or until tender. Remove from heat. Combine carrot, peanut butter mixture, bell pepper mixture, and linguine in a large bowl; toss well. Sprinkle with cilantro. Serve warm or at room temperature.

Asian Salmon


This past summer my parents went Salmon fishing and brought some home for Andy and I to try. Salmon is one of those foods that I "think" I'm not going to like so I have never really given it a chance. I actually enjoyed this meal, but I'm still not sure if salmon is anything I would ever request for dinner or order at a restaurant.

Since I've never made salmon before, I knew I wanted to find a really good recipe so I had the best chance of enjoying it. My mom and I perused a bunch of my cookbooks and I finally decided on this Cooking Light recipe, and I already had everything it called for! This particular recipe uses a plank to grill the salmon, so I adapted it to bake in the oven. I've posted the original recipe and noted my baking changes. We served the salmon with Peanutty Noodles.

Asian Salmon
Source: Cooking Light

Ingredients

1 (15 x 6 1/2 x 3/8-inch) alder grilling plank (I omitted)
1/2 cup rice vinegar
1/2 cup low-sodium soy sauce
2 tablespoons honey
1 teaspoon ground ginger
1/2 teaspoon freshly ground black pepper
3 garlic cloves, minced
1 lemon, thinly sliced
1 (3 1/2-pound) salmon fillet
1/4 cup chopped green onions (I omitted because we didn't have them)
1 tablespoon sesame seeds, toasted (I omitted)

Preparation
Immerse and soak the plank in water 1 hour; drain.

To prepare grill for indirect grilling, heat one side of the grill to high heat.

Combine vinegar and the next 6 ingredients (vinegar through lemon) in a large zip-top plastic bag; seal. Shake to combine. Add fish; seal. Marinate in refrigerator 30 minutes, turning once.

Place plank on grill rack over high heat; grill 5 minutes or until lightly charred. Carefully turn plank over; move to cool side of grill. Remove fish from marinade; discard marinade. Place fish, skin side down, on charred side of plank. Cover and grill 15 minutes or until fish flakes easily when tested with a fork. Sprinkle with onions and sesame seeds.

*If not grilling, preheat oven to 400 degrees and bake salmon for 15 minutes, until fish flakes easily when tested with a fork


Monday, November 30, 2009

Crunchy Caramel Reeses Cookie Bars


Once again, Picky Palate posted an amazing recipe that I could not wait to make. If any of you watch the Food Network as often as I do, you may recognize the writer of this blog, Jenny, from a few recipe cook-off competitions they have had. It is also inspiring to see all the great recipes she has come up with, after starting out basically the way I am now!

But back to these bars. I made them to bring to class, and then brought the rest to Thanksgiving, and they were a hit! Perfect with a glass of milk or coffee, these are quite rich but so tasty.

Crunchy Caramel Reeses Cookie Bars
Source: Picky Palate

1 Roll Sugar Cookie Dough, Pillsbury (or use your favorite sugar cookie recipe)

1 Cup crushed pretzels
3 Cups mini Reeses Peanut Butter Cups, unwrapped
10 Kraft caramels, unwrapped
1 Tablespoon milk
1/2 Cup semi sweet chocolate chips

1. Preheat oven 350 degrees F. Line a 8×8 baking dish with foil and spray with cooking spray. Cut cookie dough roll in half and press half into bottom of baking dish. Layer with pretzels. Cut PB cups in half and layer over pretzels. Melt caramels and milk in a microwave safe bowl until melted, about 1-2 minutes in microwave. Pour caramel over PB cups. With remaining cookie dough, crumble evenly over top PB cups. Bake for 22-25 minutes or until golden brown and cooked through. Let cool completely. Melt chocolate chips in microwave until smooth, drizzle over top of bars.

9 bars

Sunday, November 29, 2009

Chocolate Fudge Butterfinger Cookies


I whipped up these cookies a few weeks ago to bring over to our neighbors. Since moving in, Erin and Sam have been great to us, and when they invited us over for ribs one Sunday I wanted to bring a little treat for dessert. I had starred these in my google reader a few days before and knew immediately I had to make them. I mean, how could I pass up any recipe that incorporates my favorite candy bar?!

These cookies are amazing. They were fresh out of the oven when we made the trek across our lawn to Erin and Sam's house, so by dessert time they were still warm and full of fudgy goodness. The butterfinger taste is pretty subtle, but they almost melt into a caramel-like texture. I really can't wait to make these again.

Chocolate Fudge Butterfinger Cookies
Source: Picky Palate

1 cup butter
1 cup sugar
3/4 cup brown sugar
2 eggs
1 tsp. vanilla
1 3/4 cups flour
1 1/4 cups cocoa powder (I used Hershey’s Dark Chocolate Cocoa Powder)
2 tsps. baking soda
1/4 tsp. salt
2 Full size Butterfinger Bars, crushed
1 1/2 Cups semi sweet chocolate chips


1. Preheat oven to 350 degrees and use a cookie sheet with a silpat liner.
2. In a large bowl, cream together the butter and sugars until light and fluffy. Slowly add eggs and vanilla until well combined.

3. In another bowl, combine the flour, cocoa, baking soda and salt. Slowly add to wet ingredients then stir in crushed butterfinger and chocolate chips. Using a medium cookie scoop, drop by rounded spoonfuls onto the prepared cookie sheet.

4. Bake for 9-11 minutes, should still be soft in center. Allow cookies to cool on baking sheet for 5 minutes before removing to a wire rack to cool completely.

3 dozen cookies

Chimichurri Steak Sandwiches


We ended up having enough Pepper Crusted Steak leftover that we decided to make sandwiches out of it for dinner the next night. As I googled ideas on what to make, chimichurri came to mind, even though I've never tasted it. Then I found a recipe on the Food Network website and decided it could easily be adapted to what I wanted.

These sandwiches turned out great, but almost a little overpowering with the parsley. I don't know how, but Rainbow was out of flat-leaf parsley so I ended up with curly parsley. I made the sandwiches on what we had left of the Roasted Garlic Ciabatta bread from Costco, and they were definitely a mouthful!

Chimichurri Steak Sandwiches
Source: Adapted from Food Network

Ingredients:
1 cup flat-leaf parsley
2 garlic cloves, chopped
1/4 cup lemon juice
2 Tbls olive oil
3/4 tsp. salt
3/4 tsp. pepper
Provolone cheese slices

Directions:
Pulse parsley and garlic in blender or food processor until finely chopped. Remove to a bowl and stir in lemon juice, olive oil, salt and pepper. Let sit until ready to assemble sandwiches.

Spread parsley mixture evenly over both sides of bread; place sliced steak evenly over bottom half. Layer provolone cheese on top (use as much or as little as you want). Place open sandwich in broiler until cheese is bubbly and top half is crispy.

Enjoy.

Saturday, November 21, 2009

Pepper Crusted Steak with Shallot, Mushroom and Wine Reduction


Today, Andy and I wandered around Costco, finding samples and contemplating dinner. I finally settled on buying some boneless top sirloin, 5 lbs of it to be exact. I got home and could not figure out what to do with it, and steak is never one of my top choices for dinner. I knew that I had heard of pepper crusted steak before, so I decided on that, but figured I should have a sauce for it so I went to google. I read through quite a few sauces and reductions and decided to write up one of my own.

For envisioning this on my own, it actually turned out really well. And the best part was, Andy helped me out in the kitchen! I really can't remember many meals we have cooked together, so it was really fun to be able to be together and work on this meal together.

We served this with awesome roasted garlic ciabatta bread from Costco, and some parmesan mashed potatoes. Someday I'll get better at serving veggies with every meal, probably not until I have children's health to worry about though:)

Pepper Crusted Steak with Shallot, Mushroom and Wine Reduction
Source: Kitchen Escapes original
4-6 servings

Steak:
2 lbs. boneless top sirloin ( or any cut of steak you prefer)
1 Tbls. peppercorns (or coarsley ground pepper, use more if you prefer more zip)
1Tbls. butter
1 Tbls. olive oil
salt

Shallot, Mushroom and Wine Reduction:
1 shallot, sliced
1 cup sliced button mushrooms
1 garlic clove, minced
1 tsp. dried Thyme
1 Tbls. butter
1 cup wine
1 tsp. cornstarch

Directions:
Pre-heat oven to 400 degrees.

If using whole peppercorns, grind in a spice grinder or using a mortar and pestle. Season steaks with salt and rub one side of each steak with pepper.

Heat 1 Tbls. each of butter and olive in large skillet over medium-high heat. Place steaks pepper side down and cook for about 5 minutes. Flip and cook second side 5 minutes. Transfer steaks to oven proof dish and bake until internal temperature reaches 140 degrees for medium-rare (because our steaks were huge, this took about 15 minutes). Take steaks out of oven and tent with aluminum foil to continue the cooking process and to allow juices to settle back into meat.

While steaks bake in oven, melt 1 Tbls. butter in empty skillet. Add shallot, mushrooms, garlic and Thyme. Saute roughly 5 minutes until shallot and mushrooms are soft. Combine cornstarch and wine; add to skillet. Simmer, scraping up brown bits from bottom of pan, until sauce is reduced and thickened. Season with salt to taste.

Serve sauce over steaks.

Thursday, November 19, 2009

Parmesan Garlic Orzo

This may be my new favorite side dish, so hopefully the hubby doesn't get sick of it. Sometimes side dishes are so hard to come up with, so I'm quite happy I found this recipe. I thought the garlic would be too overpowering since it's raw, but can you ever have too much garlic?!

A couple notes about this recipe, it mentions butter in the directions but not in the ingredients, so I used 2 tablespoons. Also, we used up all our parmesan cheese earlier this week, so we used asiago and it still tasted great.

Parmesan Garlic Orzo
Source: Joelen's Culinary Adventures

1 1/2 cups orzo pasta
2 cloves garlic, minced
salt and pepper to taste
1 cup freshly grated parmesan cheese
2 tablespoons chopped fresh parsley

Cook the orzo pasta according to package directions with water; drain.

Place the orzo in a large bowl and add the minced garlic and butter. Stir until butter is fully melted. Add the parmesan cheese, parsley and season with salt and pepper to taste.

Italian Buttermilk Pork Chops


I have never used buttermilk before, but now that I have tasted its glory when it comes to marinating, I may have to use it more often. Buttermilk seems to be used most often in baked goods but when marinated with chicken or pork it yields a wonderfully juicy piece of meat.

When marinated overnight, this meal comes together in a matter of minutes and we will definitely be having this again.

Italian Buttermilk Pork Chops

4 pork chops
salt & pepper to taste
1 1/2 - 2 cups buttermilk
1/2 tablespoon dried oregano
1/2 tablespoon dried thyme
2-3 cloves minced garlic
2 tablespoons olive oil

Season your pork chops with salt and pepper; place chops in a gallon sized zip top bag.

Add the remaining ingredients and place in the fridge for 4 hours to chill (or you could chill overnight too.) Remove the pork chops from the bag and pat dry.

Preheat the oven to 400 degrees.

In a hot skillet with 1-2 tablespoons of olive oil, brown your pork chops on both sides. Once browned, place the pork chops on a baking sheet and bake in the preheated oven for 7-10 minutes. Don't over cook otherwise it will result in dry, tough pork!

I served this with parmesan & parsley orzo

Gingerbread Muffins

Gingersnaps are one of my favorite cookies, but it's always hit or miss when I make them. They either turn out rock hard or taste funny. I found this recipe and wondered if it would be too good to be true.

As it turns out, I did not like these at first, but they grew on me. I've never actually had gingerbread, so I wasn't sure what to expect. I think the trick to these, that I did not make sure to do, is make sure everything is incorporated together at the end. As I was filling my muffin cups I noticed there were some big streaks of the molasses mixture, and those muffins turned out kind of weird!

In the end, most of the muffins turned out great! These were very moist, fluffy and full of gingerbread flavor. I was hesitant to make these because I had to buy buttermilk, but stay tuned to see how I used the rest of the carton:)

Gingerbread Muffins
Source: Vintage Victuals, adapted from Nathalie Dupree's recipe for Old-Fashioned Gingerbread

Ingredients:
1/2 cup sugar
1/2 cup butter
1 egg
1 cup molasses
2 cups flour
2 1/2 tsp. baking powder
1 tsp. salt
 2 1/2 tsp. ginger
1/2 tsp. cinnamon
1/2 cup buttermilk
1/2 cup coca cola, apple cider or apple juice
1 tsp. brandy flavoring or vanilla extract

Directions:
Preheat your oven to 350 degrees. Line or grease well a muffin tin, and set aside.

In a large bowl of an electric mixer, beat the sugar and butter until light and fluffy. Add the egg and the molasses and mix well.

In a separate bowl, sift together the dry ingredients. In another bowl, mix together the buttermilk, the coke or juice, and the brandy or vanilla flavoring. Add these two mixtures to the molasses mixture alternately, beginning and ending with the dry mixture. Beat until the batter is smooth.

Fill each muffin cup about 3/4 of the way full. Bake for approximately 18-20 minutes, or until the muffins spring back when lightly touched with a finger. Yield about 18 muffins.

Monday, November 16, 2009

Baked Shrimp in Lemony Garlic Sauce


In my world, lemon and garlic are always perfect together. When you add shrimp, it becomes an amazing combination. I have been making this shrimp for awhile, but I think this time I finally found my favorite way to serve it.

This dish comes together in a matter of minutes, and you can serve it with rice, pasta, crusty bread, cous cous etc. Another plus is if served alone, it is relatively healthy for you, only 4 weight watchers points per serving!

Baked Shrimp in Lemony Garlic Sauce

Ingredients:
1 1/4 lb shrimp, peeled and deveined (I always just use frozen shrimp, and it works out great if you pull of the tails after you defrost the shrimp so you don't have to worry about them when you eat)
1 spray cooking spray
1/4 cup lemon juice
2 Tbls. butter, melted
3 garlic cloves, minced
1 tsp. worcestershire sauce
3/4 tsp. lemon pepper
1/4 tsp. red pepper
2 Tbls. parsley, chopped

Directions:
Preheat oven to 425 degrees.

Arrange shrimp in a single layer in a 13 x 9-inch baking dish coated with cooking spray. Combine lemon juice and next 5 ingredients; pour over shrimp.


Bake for 8 to 10 minutes or until shrimp are done. Sprinkle parsley over shrimp; serve immediately.

*I served this with cavatappi pasta and green beans that were boiled along with the noodles for about 4 minutes; drain noodles and beans, pour shrimp and sauce in with noodles and beans. Grate some parmesan cheese in, add extra extra-virgin olive oil if needed.

Sunday, November 15, 2009

Slow Cooker Baked Potato Soup


Baked potato soup is one of my favorite soups this time of year, so I was very intrigued to find a recipe to make it in the slow cooker. When I saw that Cub has 5lb bags of potatoes for 68 cents (!) this week I figured it was a great time to try this.

Wow, is this soup good. It is so creamy, perfectly seasoned, and tastes better than some restaurant soup I've had. The only difficult thing about this recipe is that I do not have an immersion blender or a potato masher, so I ended up just using my blender and doing about 3 batches of soup. I did leave some big chunks of potato as well. Also, this makes A LOT of soup, so make sure your slow cooker is at least 6 quarts. We probably have enough left over to eat for lunch and dinner for the whole week! Maybe next time I'll try to halve the recipe.
Slow Cooker Baked Potato Soup
Source: A Year of Slow Cooking, adapted from RecipeZaar

Ingredients:
-5 lbs potatoes, peeled and diced in 1 to 2-inch chunks
-1 teeny onion, diced
-4 cloves garlic, minced
-1 teaspoon seasoned salt
-1/2 teaspoon black pepper
-1/2 teaspoon red pepper
-2 quarts chicken broth (8 cups)
-2 (8-ounce) packages cream cheese, to add at the end
-crumbled bacon and green onion or chives as garnish (optional)

Directions:
Use a 6 quart or larger slow cooker. Peel and dice the potatoes, and put them into the stoneware. Add onion and garlic. Sprinkle in the seasonings, and pour in the broth. Cover and cook on low for 8 hours, or on high for 4. The potatoes should be fork-tender. You can use a potato masher to mash the potatoes in the soup, or a hand-held immersible blender. I suppose you can also leave the potatoes in chunks, if you really wanted, but I wanted a smooth soup.

After smashing the potatoes, crumble in both packages of cream cheese, and put the lid back on. Cook on high for about 30 minutes, or until the cream cheese is completely dissolved. Stir a few times during the 30 minutes. (I let it cook for about 1 hour more after adding the cheese)

Garnish with crumbled bacon, green onion or chives, and I'd assume cheddar cheese would be just delightful.

Tiramisu Bundt Cake


Mmm, coffee and Kahlua, such a great combination. This cake is amazing. I really don't know what else to say, it is so moist, with a hint of coffee and Kahlua flavor. I was not at work for 2 weeks, so I decided to bring this cake as a sort of "welcome me back, thanks for not firing me" treat, and I have never had such rave reviews from my co-workers. They always love when I bring treats, but the response was nothing like this, I think they had the cake gone in less than 2 hours. I can't wait for an excuse to make this again!


Tiramisu Bundt Cake
Source: Baking Bites

Ingredients:
3 cups all purpose flour

2 tsp baking soda
1 tsp baking powder
1 tsp salt
3/4 cup butter, room temperature
1 1/2 cups sugar
3 large eggs
1 tsp vanilla extract
1 1/2 cups milk
1/4 cup espresso or very strong coffee
1/4 cup Kahlua

Directions:
Preheat oven to 325F. Grease and flour a 12-cup bundt pan.


In a medium bowl, whisk together flour, baking soda, baking power and salt.

In a large bowl, cream together butter and sugar until light. Beat in the eggs one at a time, followed by the vanilla extract. Working in two or three additions, alternate adding the flour mixture and the milk into the large bowl, ending with an addition of flour, and mixing just until everything is incorporated.

Remove 1 cup of the batter into a small bowl. Remove another cup of batter into a second small bowl. Add espresso to one of the small bowls and whisk until well-combined. Add Kahlua to the second small bowl and whisk until well combined.

Pour half of the plain batter into the bundt pan and spread into an even layer. Pour the Kahlua batter into an even layer on top of the plain batter. Pour espresso batter on top of Kahlua batter. These batters maybe slightly thinner, but do not mix or stir them. Carefully spread all remaining plan batter into the bundt pan.

Bake for 55-60 minutes, until a toothpick inserted into the center comes out clean.

Let cake cool in pan for 15-20 minutes, then turn cake out onto a wire rack to cool completely before frosting.

Serves 16.


Kahlua Mascarpone Frosting

1/4 cup butter, room temperature
4-oz mascarpone cheese, room temperature
1/4 cup Kahlua
2 cups confectioners’ sugar

Combine all ingredients in a medium-sized mixing bowl and beat at medium-high speed until very smooth and fluffy. Use a butter knife or spatula to apply the frosting to the bundt in a thick, even layer.

Bacon Potato Frittata


Growing up, I loved having breakfast for dinner. Something about pancakes at night was comforting and fun. However, I am now married to someone who has never allowed me to cook breakfast for dinner. This frittata was my way of tricking him into it, and we paired it with blueberry muffins so it really was like breakfast!

I have never made a frittata before, and it is so quick, easy and versatile that I foresee more in the future. However, I do not have a non-stick skillet so we had some trouble getting this out of the pan. I will add a non-stick skillet to my neverending list of kitchen gadgets and tools I want.


Bacon Potato Frittata
Source: Recipezaar

Ingredients:
4 slices bacon, cut into 1/2 inch pieces

2 medium potatoes, cut into 1/4 inch slices
6 large eggs, lightly beaten
1/4 cup milk
1/2 teaspoon pepper
1/4 teaspoon salt
1 1/2 cups grated parmesan cheese
1/2 cup thinly sliced green onion
2 teaspoons finely snipped fresh basil or dried basil, crushed  (I used parsley)
salsa (optional) or sour cream (optional)

Directions:
Using a large, nonstick skillet, cook bacon pieces until crisp; Reserve 2 T. of bacon drippings; Drain bacon pieces on paper towel.

Add potato slices to skillet with reserved bacon drippings; Cover and cook over medium heat for 12 to 15 minutes until tender and lightly browned.

Turn potato slices over and turn down heat to prevent over-browning (if necessary).

In large bowl, beat eggs, milk, pepper, and salt until combined. Stir in cheese, green onion, and basil(parsley). Set aside.

Spread cooked potatoes in an even layer over the bottom of skillet.
Sprinkle the bacon over the potatoes.
Pour in egg mixture.

Cover, reduce heat to medium low.

Cook 15 to 20 minutes until top surface of egg is set.

Decrease heat to low if necessary, to allow center to cook without over-cooking the edges.

Loosen edges of frittata from pan, carefully invert onto large serving plate.

Cut into wedges.

Put a dollop of sour cream or salsa on top right before serving, if desired.

Crockpot Burrito Soup


This was one of those recipes that I knew immediately when I saw it, I would need to make it, and make it soon! This soup is delicious and so comforting. It also seems to be much tastier the next day, but don't most soups and chili's?

I've actually made this twice already, and it is definitely better if it cooks for a long period of time. The first time we had this, it only cooked for a couple hours and it was very bland, but by the next day everything had married together and it was great. The second time, I let it cook for about 6 hours, and it was perfect. We also upped the rice to about 1 cup, so it is very thick and more like a chili than a soup. I also used a whole cup of corn just to get more veggies in:) We also don't used ground beef, so I used ground turkey. My changes are reflected in the recipe below (refer to originals to see the difference).


Crockpot Burrito Soup
Source: adapted from Loves to Eat, originally from elly says opa!

Ingredients:
2 tsp. oil

1 large onion, diced
1 lb. ground turkey
4 cloves garlic, minced
1 can (8 oz.) tomato sauce
5 cups beef broth
2 Tbsp. aleppo (or any) chili powder)
1 Tbsp. cumin
2 tsp. oregano
1/4 tsp. cayenne pepper
1 cup corn
1 can black beans, drained and rinsed
1 cup uncooked rice (or, cook rice separately)

Directions:

Heat a large heavy-bottomed skillet over medium heat and add oil. Cook the onions for a couple minutes before adding the turkey. Brown the turkey with the onion and drain if necessary. Put back on the heat and stir in the garlic, just until fragrant.

Pour the turkey mixture into the crockpot and then add the tomato sauce, beef broth, spices, corn and black beans. Cook on low for…however long you’re gone.

Increase temp to high and add the rice, just until cooked. Alternatively you can put the cooked rice in bowls and ladle the soup over it. Garnish with your favorite toppings.

Thursday, October 29, 2009

Chicken with Asiago Sauce


OMG. That was the first thing that came out of my mouth when I tasted this, until Andy told me to never talk like that again. All language aside, this was the first meal I've cooked that I thought actually tasted almost restaurant quality. Andy gave it a 5 out of 10, and said that it was "too bland" looking, but I've come to think we have different palates. I thought it was awesome, and I was equally proud that I finally conquered how to make a roux. I had to dump out my first attempt tonight because it was not thickening like it was supposed to. I was following a Rachael Ray recipe, but have you ever seen her actually measure anything? She'll say she's adding a tablespoon of something, but it really looks like half a cup! Anyway, the recipe calls for a tablespoon of flour, and since I've never seen her use an actual measuring spoon, the second time around I used her method of using a large 'eating' tablespoon and what do you know, it worked!

I served this with some frozen cheese ravioli, but I think it would be better with regular pasta. It was almost too much of the same consistency/flavor going on. This would also be really good on top of veggies.

Chicken with Asiago Sauce
Source: Adapted from Rachael Ray
Serves 4

Ingredients:
4 boneless, skinless chicken breasts
2 Tbls olive oil
salt, pepper, garlic powder

2 Tbls butter
1 heaping Tbls flour
1 1/2 cup milk
1 cup Asiago cheese, grated
1/8 tsp Thyme, chopped
salt and pepper to taste

Directions:
Heat oil over medium heat in skillet; season chicken with garlic powder, salt and pepper. Add to hot pan and cook 6-8 minutes on each side, until juices run clear.

While chicken cooks, melt butter over medium heat in small saucepan. Whisk flour into melted butter; cook for 1 minute; roux should be thick, if not add a bit more flour. Whisk in milk and cook to thicken, about 5 minutes. Stir in cheese and thyme; add salt and pepper to taste.

Serve chicken breasts topped with cheese sauce.

Enjoy:)


Wednesday, October 28, 2009

Weirdest dinner ever.....

but surprisingly tasty! However, it does not photograph much better than a pile of mush:(


I love to clip coupons, whether or not it saves me money, I don't really know but I do it anyway. Quite often the Sunday paper has coupons for Hillshire Farm products, and I always feel the need to stock up on smoked sausages. I don't even particularly like these sausages, but in my quest to serve less chicken for the hubby, these are a quick alternative.

I had one of these bad boys to use up, so I ventured to the Hillshire Farm website to get some inspiration. I found this recipe, and decided that it could easily be adapted with the minimal supplies I have right now. Below is my take on the original (which could possibly be just as good, I just didn't have the right ingredients).

Baked Pasta and Smoked Sausage
Source: Adapted from Hillshire Farm
Serves: 4-6

Ingredients:
1 (16 oz.) package Hillshire Farm Smoked Sausage
1 can Campbells Fiesta Nacho Cheese soup
2 1/2 cups milk
2 1/2 cups dried pasta of your choice (I used elbow macaroni)
1 cup cheddar cheese

Directions:
Preheat oven to 375 degrees.

Cut sausage into 1/4" slices and brown in a skillet; drain.

Combine milk, soup, pasta, and 1/2 cup cheese in a 2 1/2-3 qt casserole dish. Add cooked sausage.

Cover tightly with foil and bake for 45 minutes. Remove foil, sprinkle with remaining 1/2 cup cheese and bake for 3-5 more minutes. Let stand 5 minutes before serving.


Tuesday, October 27, 2009

Enchilada Bites

Ah Girl's Night....a great excuse to meet up with old friends, eat junk food and drink too much:) This past weekend I met up with old roommates for a night out, and I knew that dip's are usually the most common appetizer for people to bring, so I wanted something different. I stumbled upon this recipe for Enchilada Bites and immediately knew I had found my party contribution.

I had a lot of trouble making these, and almost gave up before I finished. The original recipe seemed to leave out some helpful hints, or else I was doing something wrong. I also doubled the recipe, leaving some extra filling for delicious and easy enchiladas a couple nights later. Below is my adaptation of the original recipe.


Enchilada bites
Source: Adapted from Home is Where the Holman's Are
Makes 24-36

Ingredients:
8 corn tortillas
2 cups cooked, shredded chicken
2 cans cream of chicken soup (low sodium/healthy request works fine)
1 can (1 cup) enchilada sauce (Old El Paso Hot)
Mexican cheese blend, about 1 cup

Directions:
Preheat oven to 350 degrees.

Combine shredded chicken, soup and enchilada sauce and heat until bubbling. Cut 3" circles out of each tortilla (3 circles per shell), place cut-outs in microwave and heat according to directions on package, about 30 seconds. Once warm and pliable, press each round into well of a mini-muffin tin.
*This is my adaptation of the original recipe, I finally figured out that the only way to get the rounds to fit into the muffin tin without crumbling was to warm them up first.

Spoon mixture evenly into each muffin cup. Top each with shredded cheese. Bake for 15-20 minutes until cheese bubbles and begins to brown. Use a spoon to pop out each bite.

Enjoy.

Wednesday, October 21, 2009

Pancetta-Wrapped Pork Roast


(ugh, excuse the horrible photo, taken on my iphone since my other camera stinks, thought this might be better)

We eat a lot of chicken here in our humble Georgia Avenue home. Boneless, skinless chicken breasts are just so easy, and there are seriously so many ways to make chicken! When it is brought to my attention that all we eat is chicken, I try to expand our menus a bit. Normally, I wait until I find some good deals on pork, and occasionally I'll stock up on steak and tilapia at Costo. One item that I always look for though are boneless pork loins. When I buy one, this is my go-to recipe for pork roast. I guess someday I should try something else, but this is SO good, and it makes the hubby happy:)

One thing I don't like about the recipe is that it is supposed to be roasted in a roasting pan, and I have not acquired one yet. It still turns out great, but makes me wonder what the difference would be (and it just furthers my 'need' for a roasting pan.)

Another helpful hint regarding the pancetta: I have normally found this by the 'gourmet' cheeses in the grocery store, but on my recent trip to Rainbow it was nowhere to be found. I ended up having the deli counter slice me some, and since I forgot how much the recipe called for I got 8 thin slices and it worked out perfectly.


Pancetta-Wrapped Pork Roast
Source: Giada De Laurentiis

Ingredients
8 large garlic cloves
1 tablespoon finely chopped fresh rosemary leaves
1 tablespoon finely chopped fresh thyme leaves
1 tablespoon olive oil
1 (3 1/2 to 4-pound) tied boneless pork loin roast (I always use the pre-packaged one's in the meat section, about 3 pounds, and is not tied)
Salt and freshly ground black pepper
4 ounces thinly sliced pancetta
1 1/2 cups chicken broth
1 1/2 cups dry white wine

Directions
Blend the garlic, rosemary, thyme, and oil in a small food processor, scraping down the sides of the bowl occasionally, until the garlic is minced.

Sprinkle the pork roast generously with salt and pepper. Arrange the pancetta slices on a work surface, overlapping slightly and forming a rectangle. Spread half of the garlic mixture over 1 side of the pork and between the 2 loins that meet in the center of the tied pork roast. Place the pork, garlic mixture side down, in the center of the pancetta rectangle. Spread the remaining garlic mixture over the remaining pork. Wrap the pancetta slices around the pork. Place the pork in a roasting pan. Cover and refrigerate at least 1 hour and up to 1 day.

Preheat the oven to 400 degrees F.

Pour 1/2 cup of broth and 1/2 cup of wine into the roasting pan. Add more broth and wine to the pan juices every 20 minutes. Roast the pork until a meat thermometer inserted into the center registers 145 degrees F for medium-rare, about 1 hour. (since mine was only 3lbs it took about 50 minutes) Transfer the pork to a cutting board. Tent with aluminum foil and let stand for 10 minutes. Pour the pan drippings into a glass measuring cup and spoon off any fat that rises to the top. (I also did not do this, and did not use any of the juices. I feel the roast does not need the extra juice, but again, a roasting pan may change my mind.)

Using a large sharp carving knife, cut the pork into 1/4-inch-thick slices and serve with the pan juices.

Enjoy!

Sunday, October 18, 2009

Pork Potstickers

A few months ago I had an assignment at school to attend a 'cultural event.' After my first attempt at an event turned out to be a bit disappointing, I found plan B. Plan B took me to my first Asian grocery store, United Noodles, and it introduced me to Dr. Lo. Dr. Lo works with my mom, and she taught me how to make traditional Pork Potstickers, as well as the history behind how these dumplings came to be called 'potstickers.'

This is the first time I have made potstickers since meeting Dr. Lo, but I was surprised by how much I remembered! These are definitely fun to make, but a bit time consuming. Next time I think I'll invite someone to join me (my mother-in-law has already requested I teach her!).

Here is a shot of the potstickers during the pan-frying stage:

Here is a shot during the final, steaming stage:


Pork Potstickers

Ingredients:
1/2 C. finely chopped Bok Choy leaves
1/2 C. finely chopped Sui Choy (Napa cabbage)
1/4 C. finely chopped green onion
1/4 C. finely chopped shitake mushrooms
1 Tbls. finely chopped ginger
1 lb. ground pork
1 tsp. soy sauce
2 tsp. Chinese rice wine
1 tsp. sesame oil
dash of black pepper
1 egg yolk
1 package wonton or gyoza wrappers

water for sealing wrappers and steaming
vegetable oil for pan-frying

Combine all ingredients through egg yolk (easiest to use your hands.) Place a heaping teaspoon of filling in the middle of a wrapper, being careful not to overfill or get too close to the edge.

To fold the dumpling, moisten the edges of the wrapper with water. Gently fold the wrapper up over filling and crimp edges to seal tightly. Cover dumplings with a slightly damp paper towel until ready to cook.

Heat a non-stick skillet over medium-high heat and add 1 tsp. vegetable oil. Add 8-10 potstickers, being careful to not overcrowd the pan. Fry 2-3 minutes, until the bottom is browned. Add 1/3 cup water, cover and let steam until all the liquid is absorbed, about 4-5 minutes. Remove from pan and cook the rest of the potstickers.

Serve alone, or with the following simple dipping sauce:
4 Tbls. soy sauce
1 Tbls. sesame oil
2 tsp. finely minced ginger
2 tsp. chopped green onion
pinch of sugar, to taste

Sunday, October 11, 2009

Homemade Noodles

This is my mom's recipe for the noodles she makes for Chicken Noodle Soup. The recipe is really simple, but don't let the dough fool you. It will seem too crumbly, and you may have to add a drop of water, but when rolled out it will turn into great noodles. Next time I will make a double batch though.

Homemade Noodles
Source: my mom

Ingredients:
1 cup flour (I used half regular and half whole-wheat)
1 egg
1/2 tsp salt
1/4 tsp butter
1/4 tsp baking powder
2 Tbls milk

Measure flour into a bowl and make a well in the center. Add all remaining ingredients, mix with a fork until stiff. (This is where it stayed crumbly for me, so I used my hands and added a couple drops of water just before rolling it out.)

Roll dough into a very thin rectangle, let dry for 20 minutes. Roll up dough and cut into strips (next time I will dust some flour on before rolling up in order to make the un-rolling a bit easier.) Unroll or shake out noodles, lay flat and let dry for 2 hours.

Boil for 10 minutes.

Enjoy.

Chicken Noodle Soup

Wow, it has been over a month since the last time I posted anything. My internship is keeping me a lot busier than I expected, so home-cooked meals have been lacking a bit around our house. And my treat baking has been pretty much non-existent, unless you count the pre-packaged cookies I made out of desperation one day.

Today I finally had some extra time, we had our first snow yesterday, and Andy and I are both feeling colds coming on....so that means it's soup time!! This is my mom's recipe, it's the soup I grew up on and there is nothing more comforting. I have fond memories of her homemade noodles drying on the counter, mainly because everytime I walked by I would sneak one, hoping she wouldn't catch me.

So tonight I made mom's chicken noodle soup with homemade noodles, and it was delicious. Everything went smoothly until I went to take the garbage out, and came back in to catch the dog eating the noodles off of the counter, boy was she in trouble! She only got to half of them, but it was too late to make any more so our soup was lacking in the noodle department.

In my excitement to eat, I forgot to take a picture of the soup, so the uncooked noodles will have to suffice for today. I'm sure you can imagine what chicken noodle soup looks like:)


Chicken Noodle Soup
Source: my mom

Ingredients:
1 whole chicken
Approximately 8 cups chicken broth
Approximately 1 cup each of celery, carrot and onion
1-2 Tbls chopped parsley
Potatoes (I used 2 red potatoes)
2 garlic cloves

Place chicken in stock pot, add broth (if chicken isn't fully covered add water until it is). Simmer about 1-1.5 hours until chicken is tender. (I also added roughly chopped garlic and onion to my broth, can't go wrong with that) When chicken is done, remove to cool.

Add carrots, celery, onion, potatoes and parsley to broth. Cook while deboning the chicken, about 1/2 hour. Return chicken to the pot. When ready, bring soup to a boil and add homemade noodles. Cook 10 minutes. Salt and pepper to taste (I also added a couple shakes of seasoned salt.)

Enjoy.

Sunday, August 23, 2009

Mongolian Beef

Chinese take-out is one of my ultimate comfort foods. Unfortunately, I have never really ventured out past sweet and sour chicken and lo mein. Also very unfortunate is that I have never had Mongolian Beef before. Sad, I know. So when I saw this recipe at elly says opa! I immediately saved it.


This dish is amazing. It tastes just like take-out but is a lot healthier and cooks up in a matter of minutes. I'm not sure if it really tastes like take-out Mongolian Beef, but I'm ok with that because it's still awesome. I think this recipe will make many repeat appearances in our kitchen.


I didn't change anything from this recipe, but next time I might add more water. My sauce thickened up a lot and didn't really leave any 'sauce' in the end. I also added in a bag of frozen vegetables (asian medley) right at the end and served this over brown rice. Also, it says it serves 2 but we had at least 2 servings left over. This could be because I added vegetables, or I may have used more than 2/3 lb steak. I would love to have a kitchen scale to help me out with issues like this, so maybe I will add that to my Christmas list:)


Mongolian Beef
Serves 2
Adapted from Pink Bites
Ingredients
2/3 lb. flank steak, sliced across the grain
3 Tbsp. corn starch
3 tsp. canola oil, divided
1/2 tsp. grated ginger
2 cloves garlic, minced
1/3 cup low-sodium soy sauce
1/3 cup water
1/4 cup brown sugar
1/4 tsp. (heaping) red pepper flake
s2-3 large scallions, sliced

Pat the steak pieces and make sure they’re dry; then, toss the steak and cornstarch together. Be sure all pieces are fully coated, but shake off excess corn starch.


Mix together the soy sauce, water, brown sugar and red pepper flakes.

Heat half the oil in a wok or large saute pan at medium-high heat and add the ginger and garlic. Once fragrant (30 seconds or so), add the soy sauce mixture. Cook for about 2 minutes and transfer to a bowl.


Turn the heat up on the wok and add the remaining oil. Add the beef and cook, stirring until just browned. Pour the sauce back in and let it cook with the meat. (This is where I added in some vegetables, already steamed in the microwave.) Let the sauce thicken to your liking, and then add the green onions in just before plating.


Serve with rice. Enjoy.


Thursday, August 20, 2009

Cinnamon Roll Cupcakes

Wow. I don't even know what else to say about these 'cupcakes.' They are like bite-size cinnamon rolls and I can't stop eating them (I've already had two tonight:/) These are a bit time consuming but are so worth the work.


This was actually my very first experience baking with yeast, and it turns out that yeast isn't really that scary. I have pushed aside all recipes that use yeast because I was scared of it. So today, I went out and bought a candy thermometer (to make sure the milk was the right temperature) and decided I have nothing holding me back and I needed to get over my fear of the yeast.

Thank god I did, or I would have missed out on the amazingness of these cupcakes.

One thing I did change about this recipe was the frosting. I'm not really a fan of cream cheese, or frosting made with cream cheese, so I made a glaze instead.


Cinnamon Roll Cupcakes


Source: Beantown Baker, taken from La Fuji Mama

Ingredients
2 1/4 tsp. or 1 packet (1/4 oz./7 g) dry active yeast
1/2 cup granulated sugar, divided
1 cup warm milk (approximately 110 degrees Fahrenheit)
2 eggs, room temperature
1/3 cup butter, melted
1 tsp. salt
4 1/2 cups bread flour
1 cup brown sugar, packed
2 1/2 Tbsp. ground cinnamon
1/3 cup butter, softened


1 cup powdered sugar
1/4 tsp. vanilla extract
2 tbls. milk


Dissolve the yeast and 1/4 cup of the granulated sugar in the warm milk in a large bowl and let stand for about 10 minutes until foamy.

Mix in the eggs, butter, salt, and other 1/4 cup of granulated sugar. Add flour and mix until well blended and the dough forms a ball. Put in a bowl, cover and let rise in a warm place until doubled in size (about one hour).

After the dough has doubled in size, turn it out onto a lightly floured surface, cover and let rest for 10 minutes. In a small bowl, combine brown sugar and cinnamon. Line cupcake pan with cupcake liners (I like to double them up because these cinnamon rolls are so moist), and lightly spray over the top of them with cooking spray.

Roll dough into a 12x22 inch rectangle. Spread dough with 1/3 cup butter and sprinkle evenly with sugar/cinnamon mixture. Roll up dough and cut into 24 rolls.

Place each roll in a cupcake liner. Cover and let rise until nearly doubled, about 30 minutes. Meanwhile, preheat oven to 400 degrees Fahrenheit.Bake rolls in preheated oven until golden brown, about 10-12 minutes. Let rolls cool completely before frosting.


Glaze:

Source: Cooks.com

Combine powdered sugar, vanilla and milk until drizzling consistency. Drizzle over warm cupcakes.


Egg Bake

I don't have a picture for this because it was just too yummy to wait for a picture. Egg Bake pretty much looks just like it sounds, and for this being my first attempt at it I received many compliments. Even though Andy hates breakfast for dinner I may have to make this again soon since he missed out on it.

Again, this is a recipe from my mom, taken from a church cookbook. Apparently my mom is the queen of egg bakes, and I would guess it is the number one requested dish when people stay at the duck cabin.

Egg Bake
Source: my mom, and some church cookbook

Ingredients
1 lb pork sausage(jimmie dean type)
6 eggs
1 1/2- 2 cups milk
1 tsp. dry mustard
3/4 tsp. salt
2 slices bread, cubed
1 cup shredded cheddar cheese
* I added about 3/4 tsp. black pepper

Brown sausage and drain well. Beat together eggs, milk, mustard, salt, pepper and bread. Mix well and put in a greased 8x8 glass pan. Sprinkle with cheese. Cover and refrigerate overnight. Uncover and bake at 325F for 45-50 minutes.

Double for a 9x13 pan and increase cooking time to about an hour.

Enjoy!

Fruit Pizza


Last weekend I hosted a brunch bridal shower for my sister at our house. We settled on a menu of mimosas, egg bake, fruit pizza and cinnamon rolls. It was a lot of work to get everything ready and the house presentable, but it was worth it and I hope she had a special day!


I adapted this recipe a bit from Paula Deen. I omitted the orange and blueberries, and only used chocolate chips for the ending drizzle.


Fruit Pizza

Source: Paula Deen


Ingredients

Pizza Dough:
1 package store bought sugar cookie dough

Toppings:
8 ounces softened cream cheese
1 cup confectioners' sugar
1 large peach, sliced
1 large green apple, sliced
1 large orange, sectioned
1/2 pint fresh strawberries, sliced
6 ounces fresh blueberries
6 ounces fresh raspberries
1/2 cup white chocolate chips, melted
1/2 cup chocolate syrup

Directions
Preheat oven to 350 degrees F.
Flatten cookie dough onto a 6-inch pizza pan. Bake until firm to touch, about 11 to 15 minutes. Cool. In a medium bowl, blend cream cheese and sugar. Spread the baked cookie with the cream cheese mixture and decorate with sliced fruit. In a small bowl, combine melted white chocolate with chocolate syrup. Top the pizza with remaining berries and chocolate mixture. Slice and serve immediately.